Safiya dungarees: jury’s out…

So I’ll admit it. Like many sewists have already admitted, it was the safiya dungarees that drew me to the new Tilly and the Buttons book most. This surprises precisely no one as my love of dungarees is widely known. What did surprise me though was that, when I’d finished them, I really wasn’t sure about them.

Usually with Tilly patterns (and yes I know this is the third tilly pattern blog in a row) I can decide by looking at the pattern whether I’m going to like it on me or not. For example: Bettine ✔ Coco ✔ I know both of these patterns (among others) suit me and are comfy to wear. Conversely, I know that the Etta dress is too fancy for me and the Orla blouse is too high cut to flatter my ample bust. I’ve been sewing for years now and I know what suits me and what I should just ignore. Or so I thought.

My flirtations with Make it Simple began with the Suki dress. I had some gorgeous bright teal linen look cotton and thought it would be a nice summer dress. I finished it beautifully but it looks horrendous on. It’s too much over my bust and makes me feel enormous. I’m going to refashion it into an ogden cami dress hack. Next up was the Tabitha T-shirt. I used a striped black and white Jersey with black rib for the neckband. Despite the hell that was stripe matching, it is a very comfy and wearable top. Think I’ll make a size down next time but that’s the way it goes.

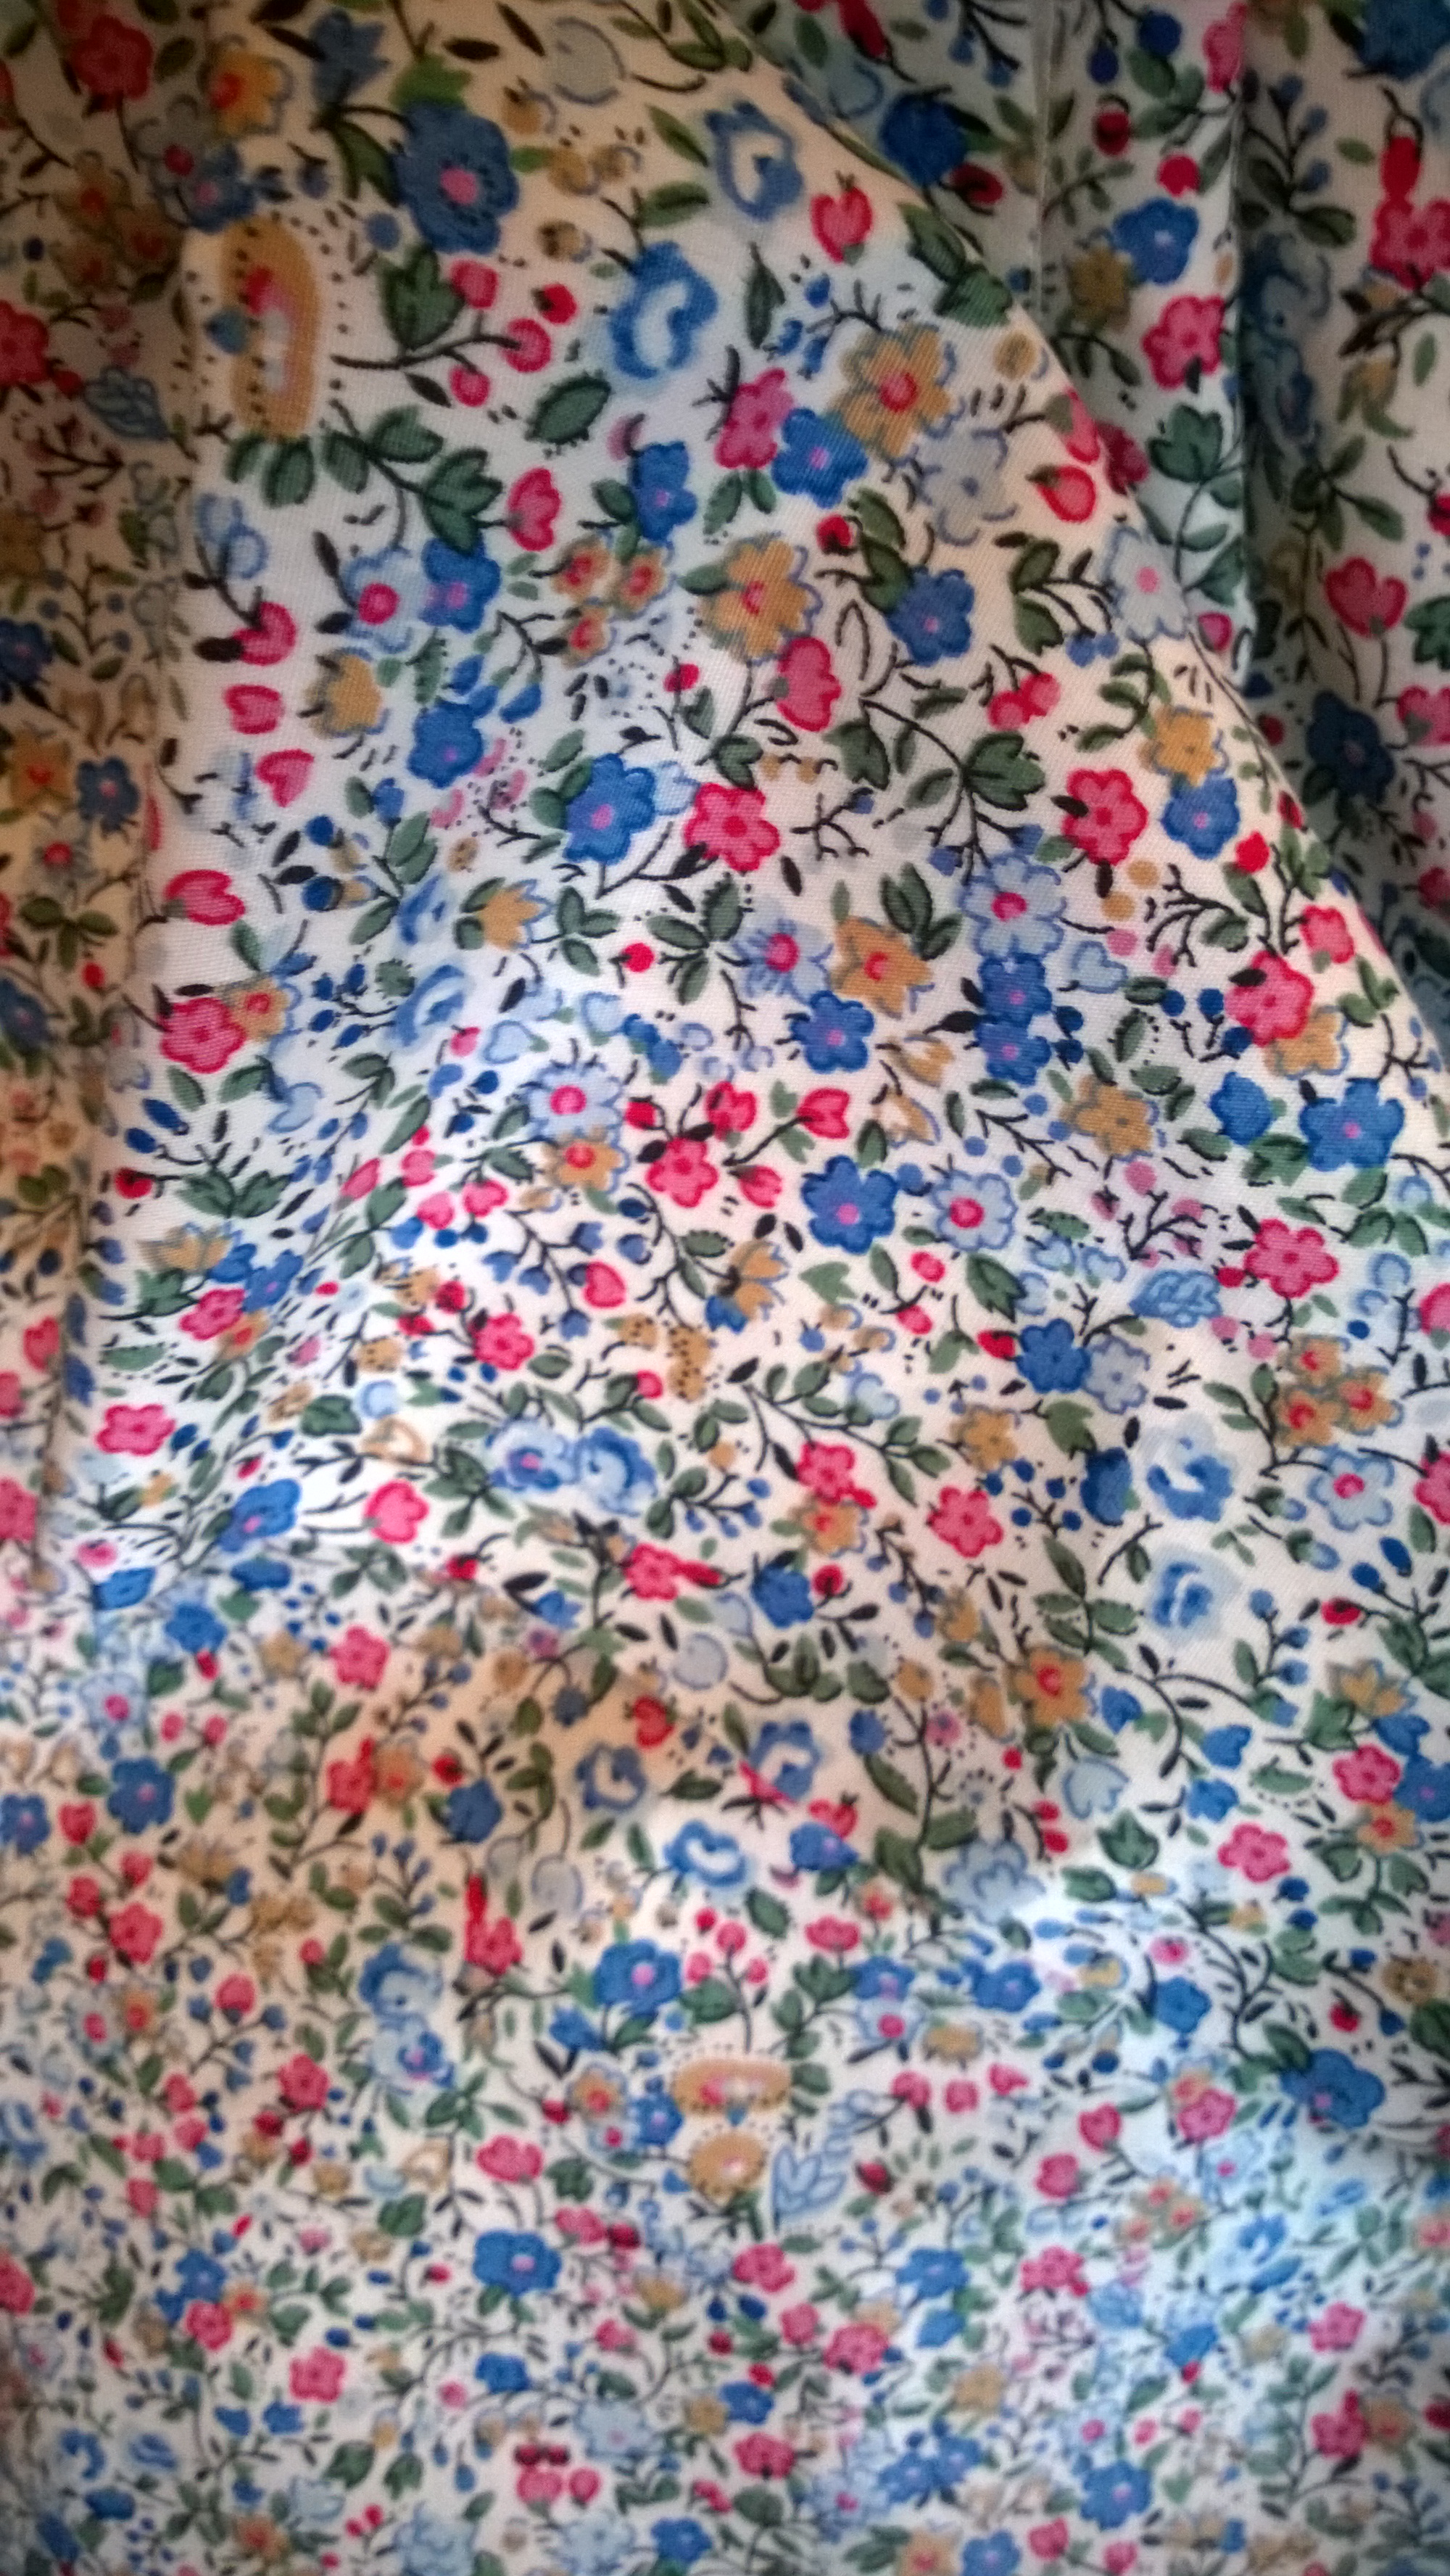
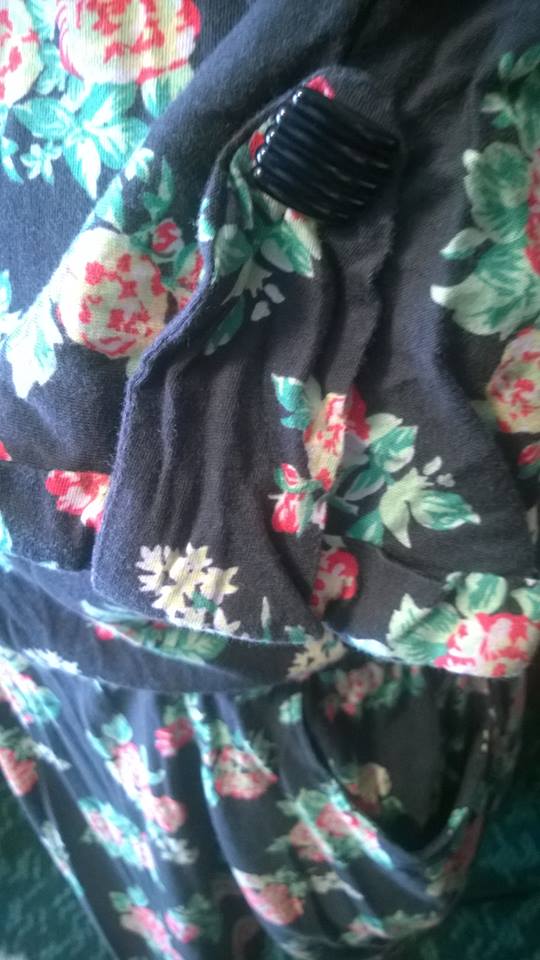
Next I figured I’d tackle the Safiya, opting for the dungarees rather than trousers. I had some lovely black crinkle viscose with a pink tropical flower print. Let me tell you crinkle viscose is lovely to wear but awful to cut and sew. It moved all over the place of its own accord. I’m going to go ahead and assume this is why I so many issues with the pattern fitting together.  The trousers were largely fine but the bottom edge was wildly uneven at the side seams. No clue what happened there. The bodice was okay but I think I mucked up the darts as it was a bit of a palaver getting the side seams to fit.

Joining them together went okay. Straps and facing was where it went to pieces. As I discovered playing sewing rebel bingo from the love to sew podcasts Instagram story, notches are often ignored by sewists, me included. I have started however to see their value recently, and I wish to god I’d just remembered to snip them in on the bodice and facing. The facing was altogether too small for the bodice and there was a certain amount of discrete pleating going on to make it fit. Then the straps were sewn on wrong about 3 times. I eventually got it right and then the front of the bodice was super gapey (I’m talking, if I wasn’t wearing a top underneath bending down to tie my shoe would have resulted in a massive boob avalanche). I fixed that with a couple of tucks into the front next to where the straps are. It’s not the neatest but fortunately the dark colour and print hide my multitudinal sins.

I decided from the beginning to make the length as per the pattern to see where the legs fall on me without adjustment. As it is, with a small hem, they hit just the top of my foot/ mid ankle. They aren’t long but aren’t short like culottes. I will definitely make my next pair culotte length and then work out how much to add to make them floor length (my preferred length for wide leg trousers). But when I wore them as they are my mum assured me that they didn’t look odd.

So while I was sewing these dungarees I saw a reminder about the #sewingbeestyle competition run by @sewistandthecity on Instagram. I had absolutely meant to take part and had never settled on what to make. This fit the bill perfectly, channeling both holiday week and children’s week. So I decided to get them finished and wore them to my cousin’s socially distant 21st birthday (gin in his garden) where they got lots of compliments and my uncle took a picture for me to submit them to the competition.

Just a bit of fun I always think, I never win anything. I always enter the comps both the ones with random selection and with actual winners. I’m just not a winner. Or at least until this one, because I won a prize! I was so surprised and so giddy. I had so many mixed feelings about these dungarees. Guess I still do but I am decidedly more positive about them now that other people feel they are prize worthy.

I might just not make them again for a while.

TLSO

X

The Indigo dress (finally)

This dress has been a long, long time in the creation process. I cut the fabric out in December I think. At the time I wanted it to be a sleeveless hack so I could wear tops underneath in the winter and bare armed in the summer. And so when I cut the fabric out I omitted the sleeves thinking I’d face the arm holes with bias binding. Which I did… at first.

First of all, I need to say, I’m considering this a wearable toile because there is lots wrong with it. I love it, don’t get me wrong, but next time will be so much better. The fabric is super soft and floaty. I think it is a viscose of some sort (feels like a challis) but is has next to no body and is distressed by the slightest breeze (I’m sure you can imagine what a joy it was to steam iron…).

So anyway, the fabric was cut out and ready to go but I just couldn’t be bothered. And then lockdown happened and it suddenly cropped up at the top of my ‘to sew’ list again. Construction went well until the gathered skirt. I’d faced the armholes in black bias binding and it was fine, a bit gapey but fine. So, time to crack on with the gathers. Tilly recommends 3 rows of gather stitches in a contrasting thread. Okay, I thought, what colour contrasts enough with this floral? I settled on bright green for the gather stitches. Unfortunately the thread was of such poor quality it snapped everytime I pulled it. This happened everytime. Pull, snap, re-stitch, pull snap, re-stitch. I screwed it up in a ball and threw it in the corner of my sewing space. I couldn’t even pick it up. I was very cross with it and genuinely believed I would never finish it.

Until this week. Approximately 9 weeks since I started it, I said “sod this. I want to wear it” (I had been ingesting lots of tilly and the buttons indigo content online and I guess I got inspired).

First I knew I needed to attach the skirt. So, with a deep breath and a gentle hand I gathered and attached the skirt to the bodice. I then tried it on and realised 3 things: the pockets were too low, I wanted sleeves and it was massive.

The pockets are okay. I might move them up at a later date but I’m dealing with it right now. The size could be fixed. I took it in by an inch and a half on each side. It’s still loose but much better. Finally, sleeves.  I got the pattern piece out and looked at the (admittedly now minimal) fabric I had left and folded my pattern to a size that I was happy with and that fitted on my fabric. It resulted in a short t shirt sleeve, which I actually love the length of. Okay, so I accidentally sewed the sleeves on the wrong sides, which I realised while pinning the second sleeve in, but it’s okay and you can’t really see it unless I point it out (which I just did…)

I’m a very lazy sewist and generally hate set in sleeves but actually this was okay in the insertion (if you ignore my mistake). When hemming the sleeves my machine went weird and loopy meaning I had to unpick and redo the hem on one. But overall, as a wearable toile, I really like it. I will try the frill sleeve one day but never again in that sort of fabric. It definitely needs some weight and by some I mean literally anything more than this fabric has.

Here she is…

Looks like a sack on the hanger…
Bit of a tuck where I took it in
Short sleeve hack
World’s bounciest facing. Even understitching didn’t help…

So overall, in spite of her flaws, I am looking forward to wearing this all year round. Bonus: for once I didn’t have to lengthen a Tilly pattern’s skirt. Disclaimer: I lengthened the bodice by 2 inches.

I am looking forward to my next one which will be in that grey double gauze I think.

TLSO

X

A Summer Bettine

So I’ve wanted to make another TATB Bettine for a while. I had made it initially in dark green christmas fabric for christmas day a few years ago. Then I made it in a cotton jersey (the incredible shrinking dress – do keep up). Finally, a couple of summers ago I made a blue chambray version. It it patterned with tiny white fleur de lis and I included the pockets, cuffs and cuff tabs (as I had on all previous versions) trimmed on this version with little wooden buttons with delicate printed dragonflies on them.

Sadly, when I made these versions I was a lot smaller than I am now, both in the bust and the booty. So, because I was foolish and hadn’t traced the pattern and simply cut it out, I only had the pattern in a size which now does not fit me. Seriously, the blue version is comically tight and I haven’t even chanced the christmas version. So what to do? I bought the pattern again and this time I traced it. I don’t feel too bad about this because I got it as part of a pattern bundle with TATB Nora and Cleo, both of which I’ve had my eye on for ages. And I’ll never regret spending my money with indie companies.

So having traced this pattern now at a more appropriate size I set about making it. I already knew I’d need to make some adjustments to it so figured before I touched my chosen fabric (the yellow floral viscose challis from a previous post) I would continue with this “being a grown up sewist” thing and make my adjustments on the pattern rather than just winging it during cutting out like I usually do. Let’s be honest, that rarely ends well. So having toyed with FBA and reading Tilly’s advice for doing this on a dartless bodice, I decided that as the bodice needed some serious lengthening anyway this might solve the issue. I was right. It did. The fabric is so soft and drapey it holds the extra length beautifully over my bust and isn’t tight in the slightest.

I lengthened the bodice by 10 cm and did the same to the skirt (both at the lengthen/shorten lines). This solved my bust issue and made it a more appropriate length for me. Tilly, I love you but your patterns are so short. For reference, lengthening the skirt by 10cm brought it to my knee ish and I am 5 foot 7.

I also made the decision to use french seams throughout (bodice and skirt) because this fabric frays like crazy. Do note, I decided this before cutting my fabric out and so trimmed myself a small extra seam allowance round each piece to give me space to make mistakes. I’m still quite new to french seams but I love them and I’m trying to use them with delicate fabrics as much as I can. I did get a cut and hem foot for my birthday but this fabric was far too delicate (I tried it on some scraps to make sure I made the right steaming choice – I did).

It’s no secret that I love this pattern. It is a real TNT and I’m so glad I’ve now made the adjustments to the pattern pieces so I can just make it up next time. The pockets are probably my favourite bit. I usually like to top stitch the facing and bag edge rather than under stitching it as I find it a bit easier and just as neat. I also decided to stitch the channel for the elastic upwards to the bodice rather than downwards to the skirt as this creates a smoother finish for the pockets. But that’s just personal preference. I do also love that the facing gets neatly top stitched down as I can’t abide a flappy facing.

So yesterday was 32 degrees and though I wanted to get some lovely photos in the garden, I was just too hot to want to do anything of that sort. So I had resigned myself to waiting until the skies cleared again (today was supposed to mark the start of a week of thunderstorms) but then the sun came out. So I threw the dress on and grabbed my photographer (mum).

And here she is.

I categorically refuse to make dresses without pocket potential…

In increasing the length, the skirt lost some of it’s iconic tulip shape but I suspect the french seams may be the reason.

Ignore the pineapple bun on my noggin…

It was super creased when I first put it on this morning but by the time I took these photos the creases had all but fallen out. I’m now even more impressed by this fabric.

I left off the cuffs and tabs because I wanted a simpler sleeve due to the delicate fabric. I love this even more than the cuffs and tabs.

So there she is. My new and adjusted Bettine pattern is ready for my next one, which I think will be double gauze, and this one is getting loads of wear already. It is a very good addition to my summer work wardrobe. Equally suited to the classroom and to working at home.

Ignore my fluffy baby hairs. They were being ridiculous today.

And that, as they say, is that.

TLSO

X

Sewing catch up

All I’m saying is that lockdown is bad for my bank account but great for my sew-jo. I’ve bought so much sewing stuff but I’ve been so inspired to actually do something with it, I’ve been tracing, cutting and sewing loads.

First of all, I’m slowly working on my sleeveless hack of the TATB indigo dress. The fabric is lovely but tricky to work with because it is so lightweight. It’s on the back burner for now because we had a falling out over the gathers. So to just get something cut and sewn I made the Suki dress from Tilly’s new book from that teal coloured linen look cotton. I hate it. The style just isn’t me. I worked so hard to make it beautiful (I used french seams and top stitched the facing down) but it looks dreadful on. So… nil desperandum. I’m planning to refashion it into an ogden cami dress hack in the summer.

But I felt let down by the Suki dress and needed something equally quick and satisfying to sew. So what did I do? Broke out my trusty agnes top pattern didn’t I? Had this purple floral jersey for years. Don’t even remember where I got it. But there is loads. My mum helped me fold it because it has so much stretch it was tricky to fold to get the most use from it. I initially cut out a skirt to make it into a dress hack but when I finished the top part I was so glad I had waited to shorten it as it was just so lovely. I’ve been saying I need more me made tops so decided to leave it as it was. I am planning to use the Jersey to make a gathered skirt to wear with it though so it will be like a fake dress. I absolutely love it. Just need to stitch a label in now.

Best neckband insertion yet!

Feeling my sew-jo reinvigorated I decided to stop faffing about and finally cut my Lilou. It was a wearable toile really because the fabric isn’t particularly me, but actually I really like it and the adjustments I’ve got to make on the next one (oh yes, there will be a next one) I’m fine with. I did toile the bodice in an old bed sheet and decided to lengthen it by a couple of inches but I think I will shorten it a bit on the next one because the waist seam is a tad low. But it’s absolutely fine for this dress because I’m planning for it to be a floaty, day at the beach, cool and comfy dress so wasn’t after it being super fitted. I took the back bodice in by an inch or so as it was gaping a bit, but a couple of triangular darts fixed that. I chose a gathered skirt version because a) I prefer gathers to pleats and b) my fabric wasn’t very wide. I was so focused on making it with French seams (my new favourite thing) that I completely forgot to add pockets. My bad. I can add them later I guess. I also didn’t line it because the only stuff I had was some cheap polyester lining and I didn’t want this to be too sweaty. Instead I faced the neck and arm holes with purple bias binding (my second favourite thing) and I love how cool just one layer of cotton poplin is. I think next time I will do the same but might lower the neck line slightly to be more flattering on my busty figure. The self drafted pleated skirt falls just below my knee so has a slight 50s vibe which I’m really digging. Here she is…

Pretty successful invisible zip without a concealed zipper foot I think
One of the darts to take it in and my label.

I’ve also just received in the post a couple of exciting things. First was a concealed zipper foot so my next Lilou will be neater. Then was this gorgeous jungle viscose crepe from fabric godmother. I’ve never ordered from fabric godmother before but I’d seen a few bloggers and vloggers make things with it and just fell in love. So I ordered 2 metres thinking … I dunno a dress or something, then it arrived and it just screamed fake jumpsuit made from Safiya culottes and an ogden cami (pattern on the way) so I can have separates as well. So I ordered another metre for the cami.

Next I ordered some viscose from amazon. Before lockdown the only fabric I ever ordered from amazon was a bit of a disappointment but based on the success of the floral stretch fabric I jumped in and bought this lovely mustard floral print viscose for £7 (?) A metre. It’s gorgeous. I’m thinking a Bettine. I also bought a pattern bundle from TATB, including a Cleo, Nora and Bettine. I already have the Bettine but back when I first made it I did not know the joys of tracing patterns so cut it out in a size which is now much too small for me. I know I’m losing weight but I figured I love this pattern so much I should buy a fresh one and trace it off. I’m a much happier bunny now. I think the floral stretch will be a nora. And I don’t have anything in mind yet for the Cleo but it’s a good one to have.

So that’s it. My current sewing catch up including a sew and tell, and a fabric and pattern haul.

Hope you enjoyed.

TLSO

X

Plans

Hey guys,

Not only am I rubbish at keeping on top of blogging, I have also not done the sewing I wanted to this summer. I have made a few faeries, and taken up Pyrography (wood burning is so much fun) and read a lot.

This last week has been full of plans. Tomorrow, I start my first teaching job so much of the planning has been for that. I have 2 year 7 classes, 3 year 8, 2 year 9 and a year 10 group, so I have a lot to plan for. My first fortnight of teaching is planned and ready to go. scary!

I have also started semi-bullet journal-ing. I need to get fitter and more active so have made a plan for a new morning routine, taken up yoga and a healthy eating plan. I feel so much better after yoga and the healthy eating is hard but will be worth it.

Finally, this week I have been planning sewing. I don’t have many items of work  wear that I like or that have been homemade. A few months back I rescued a piece of patterned viscose fabric from the remnants bin in abakhan (the new one near me!!) and couldn’t think of what to do with it. I thought about a dress but its not quite enough. My current thinking is use the fabric to make the skirt part of a Bettine dress (lengthened to knee length) and use a plain viscose for the top part.

I also have a few of the items mentioned in my last blog post to get on with and I fancy a new Arielle (shh don’t tell my mother, I still can’t get her Arielle skirt lining to match up).

anyway, that’s it from me for now. I just needed to get a blog written really. soon I hope to be back in the swing of things.

I’ll be back

The Little (Planning) Owl

xx

The ‘Never Again’ Top

If you are a regular reader you will already be aware that my love for Tilly and The Buttons patterns runs strong and deep. She produces brilliantly designed, easy to wear, day to day clothes patterns and is easily my favourite indie designer. I try to make as many of her patterns as I physically can. Those of you with particularly excellent memories may recall the time I was very grown up and traced some patterns one winter eve. One of those patterns was from ‘Love Sewing’ magazine but was in fact an early version of the Mathilde blouse from TATB. This one did not include tucks down the front, but I figured that would make things easier as I’ve never sewn tucks.

I’d bought some gorgeous floral cotton at the sewing show last year and was saving it for a summer top. It seemed like a match made in heaven. The fabric wasn’t quite wide enough to do the full sleeve, but I was planning on changing the sleeve to a shorter floatier one anyway. I had some little wooden buttons to go down the back and decided to forgo the suggested piping at the yolk and replace it with a line of burgundy velvet ribbon which I got for Christmas from Imogen. Adapted Mathilde was a go, so I cut her out and got to work.

WP_20160206_006

All was going swimmingly. The front pieces and back went together like a dream, however I noticed that the front neckline sat very high on me. So I removed the facing chopped it down and faced it with cream bias binding; much better.

My issues really began with the sleeves. I’m going to come right out and say it : I hate set in sleeves. We do not get on at all. Give me a raglan or flat sewn sleeve any day. But I was determined to make these sleeves work. I own too many tops without sleeves and wanted something that covered my shoulders so I could wear it for work, as many places are particular about shoulders on display. So I persevered and persevered, and even enlisted an expert. my attempts to insert them yielded a poor fit across the front. The darts were now in completely the wrong place. It had to be something I was doing wrong. So I asked the wife of my mum’s cousin (tenuous links I know) who is a seamstress to help. She tried re-setting them. Still no dice. I was forced to conclude that the sleeves just do not fit well. I removed them completely and faced the armholes with cream binding as I had the neckline.

My next issue came from the button holes. As those of you who know me will be aware, I hate maths and the free magazine pattern had not come with a piece indicating the placement of buttonholes. Rats! This meant working out the size and distance between the button holes myself. Drat, darn and dagnabbit! This took me literal days. Longer than the sleeve conundrum and neckline issues put together. I believe my head just wasn’t in the right place to work that out by that point. But I eventually managed it with the help of my mum and my patient other half, and the buttons fit nicely.

Then there was the matter of the sleeves (or rather, the lack thereof). I still wanted my shoulder covered so I bought some gorgeous lace from Abakhan’s thinking of pretty pleats to form gentle Victoriana -style caps. I pinned it on and something wasn’t right. She sat on Rosalind for nearly a week before a solution presented itself. It was in fact my friend Leila who helped with this one while she was staying over on a crafting bender (about which more soon). “It’s a bit twee” she pointed out, quite rightly. It was. It was twee, and cutesy and belonged in the wardrobe of a five year old. She made the brilliant suggestion of a small bow of the burgundy ribbon on the left hand side to keep it simple. I threw the lace to my sewing box and hand-stitched the ribbon on.

Here she is. She is chic, pretty, summery and I’m never making her again. She was more trouble than she was worth. I’m sorry Tilly, maybe its just me. I just hope the Fifi Pjs work out better for me.

WP_20160808_006

(apologies for the trainer. one day I’ll be able to take decent photos. but it is not this day)

TLSO

x


A very wearable toile

So as many of you will have gathered from my post about the shrinking Bettine dress, I have many bad sewing habits. These range from not pre-washing my fabric to ignoring notches (about which more soon). One of my bad habits is not making toiles before I make garments.

For those of you unfamiliar with this term, a toile (pronounced twahl) is like a mock up of a garment made to assess fit, usually in a cheap fabric called muslin. However, one may also make a wearable toile from a cheaper but similar fabric to the one you plan on using eventually. I never usually make either of these. Usually I see a pattern as either a first time lucky make or one that I will get better at making with subsequent attempts if the first doesn’t work. I also try to buy cheap fabric anyway so I don’t have to worry too much about messing it up.

However, because I had just under 2 metres of some lightweight rayon, this time I decided that I should try a wearable toile of a pattern I’d had my eye on for a while. The pattern in question is one of my famously ambiguous freebies from ‘Love Sewing’ Magazine, the Key hole blouse. I thought it would be a nice top for work and casual wear,so the perfect addition to my home made wardrobe. It has the option to put pleats down the front, three sleeve lengths and has a cute pleat at the back of the neck (which it turns out is totally necessary- who knew?). I opted for no pleats, 3/4 length sleeves, and not to make my own binding but to go with a plain black shop bought one.

I just about squeezed the pieces out. I had slightly less than I thought. The fabric was a slippery thing from one of the remnants baskets in abakhans in Manchester. It moved a lot while I was pinning and cutting so it probably wasn’t as accurate as it could have been. But I cut it, pinned it, sewed it.  AND WORE IT!

WP_20160716_001.jpg

It is a work in progress. The key hole opening is too large, but I can wear a vest or bandeau top underneath to hide gratuitous cleavage. I will make this smaller in future versions. The bias bound neckline is too thin and done in a rather haphazard way (due to its narrowness – twas the only binding I had). This is being redone as I type (well not literally, I only have two arms) and will be remedied in future versions with a wider, better quality binding. Also the curved hem was stupidly difficult to sew. In my next attempt I’m going to use bias binding as a facing to hem it. Hopefully this will make the curve easier. I also took the bias tape across the key hole in by about a centimetre just to decrease the gaping hole across my chest.

But generally, I love it. I wore it to lunch with my boyfriend and then to an open air Shakespeare performance that my friend was in last week. It was light and comfortable, looked really good with jeans and I think she is gonna be a firm favourite year round.

My next version will be orange. I’m very excited.

TLSO

x

Meet Rosalind

A while ago my mum asked what I’d like for my birthday. Usually I would um and ah for a few weeks before saying “surprises”. Then a week before my birthday I would think of something and it would be too late. Not so this year. I had wanted an adjustable mannequin for ages so when the question came I had my answer ready. My family all decided to chip in, and I was able to select the mannequin for myself. Many I looked at online either didn’t cater to my exact measurements or I was barely within their boundaries.

But finally I found one. The measurements started a few inches below mine and went up to a good few inches above. I like to call this wiggle room. She is printed with little pink roses and has a hem marker. As is my tradition, I have named her. This took more thought than finding her to tell the truth. My sewing machine is called Guinevere due to my love for Arthurian Literature. This time I wanted to commemorate my love of Shakespeare, but none of the names seemed to fit. Until I thought back to the Shakespeare play that started it all; As You Like It, and decided to name her after the main character.

So here she is. Say hello to Rosalind!

rosalind

I’ve already had lots of fun dressing her up as you can see. Here she is  sporting a home made outfit (TATB Arielle skirt and a Simplicity sleeveless blouse, which you may remember from previous posts).

rosalind dressed

I have lots of plans for sewing to come so you will certainly be seeing much more of her in the future.

TLSO

A Jersey Bettine

I’m back guys! New laptop! New Blog post!

So, a lot of people had been raving about the beauty of making a Bettine dress from Tilly and the buttons from jersey, and I was super curious.

The fuss was perfectly justifiable.I love her.I got the fabric from Abakhans Mostyn. It’s a lovely black cotton jersey with flowers on it; super soft, super lightweight, super comfy.

I opted to make the version with pockets as I don’t see the point of a dress without them. This was against Tilly’s advice but it worked out quite well. I made a neckband for the first time (replacing the facing) which could have been neater but I don’t think it’s at all bad for a first go.

The one piece of sewing advice I never follow is “pre-wash your fabric before you cut and sew”. This is the first time ignoring this advice has ever come back to bite me. I had lengthened the skirt by about 3 inches which placed the hem just on my knee (my perfect length). I wore it once then put it in the wash. when I went to wear it a few days ago, however, I noticed that the hem had risen by about 3-4 inches. It is now VERY short. I might try ironing it to stretch it but its not looking good.

Apart from that she is definitely a keeper. I’m seeing tights and boots come winter…

I also found these cute retro style buttons. What do you think?

bettine 8

so that’s it for now folks. I should be getting up to date very soon. And you can meet a very exciting addition to the sewing family who you’ve already had a sneak preview of in this post….

TLSO

x

February makes: Merida and Arielle

February was almost a write off sewing wise. I had all the plans and no sew-jo. Until my brother’s girlfriend asked for my help with her costume for a fancy dress sponsored walk. She was going dressed as Merida from Disney’s Brave, which is one of my favourite Disney movies so I just couldn’t resist.

We went fabric shopping in the half term holiday and got 3m of green satin back crepe, some golden yellow ribbon and cream cotton to make the classic Merida dress.

merida 11

While I was at uni I was taught by a lovely girl from the medieval reenactment society how to create accurate medieval dresses without a pattern; so I figured I’d use the same method for this dress. It’s really very simple; an over the head tabard (much like the walk-away. What is it about me and tabards?), with flat sewn sleeves (like Coco) and shaped from the hips down with godets. We decided that as lovely as the satin side was, the crepe side was more appropriate for a Highland Princess. I adapted the sleeves to include a fake underdress and made some gathers for the neckline.

Because this dress was so simple, she had one fitting, largely to assess the neckline and length as she is shorter than me. I’m pretty happy with how it turned out.

merida 5

So now i had my sew-jo back but only a week left of February. There was only one thing for it. I had to speed sew my velvet Arielle. Tilly and the Buttons should flipping well sponsor my blog at this rate, she has saved my bacon that many times (as you will see in blogs to come). I had the velvet already cut out, one for me and at her insistance, one for my mum too. I also had some gorgeous faun coloured lining with black polka dots which was too adorable to leave in the shop. The issue with making two of these however became apparent when I mixed up the pieces and accidentally sewed the lining and facings for my mum’s skirt (which buttons the opposite way due to cutting out) instead of my own. Drawing positively from this, when I come to make hers, the lining and facing are already sewn so its just the skirt construction and attaching everything together for hers. But, it meant I had to cut additional pieces and generally added time onto the make.

I had never sewn a lining to a facing before so the curved edges proved tricky to navigate and I kinda messed them up meaning the rest didn’t line up so well. But I unpicked and re-sewed and it looks passable now.

The main problem I had at the end was that the bottom edges don’t line up. There is maybe half an inch in it but the front is shorter than the back on the overlap.

I’m not too bothered about this as I know where I went wrong. I wasn’t too accurate with my measurements on the bottom edge when I trimmed it and turned it up. In future I will listen to Tilly and stop being a lazy sewist, and I know this will be a TNT pattern. I mean, I’m making one for mum so it has to be whether it likes it or not. Here she is finished. I basically designed it around the buttons, which I found at the sewing and hobbycraft show way back last September. I couldn’t leave buttons with sewing machines on and they are nice neutral colours. I have already worn her out. She is super comfy and goes with practically everything.

Overall, on my second making of this skirt, I much prefer the short version to the longer denim version I made. I think that will need some adjustments for summer. But its a really nice pattern to follow if you pay attention to it and don’t get too cocky.

TLSO

xx